Steve and I bought a new house in Michigan this past summer. When we moved in we had a ton of projects and renovations that we wanted to accomplish. We quickly started making a list and prioritizing. Yes, finishing the basement was on the list, but it was at the very bottom. So far at the bottom that we didn’t even know if we were going to finish it. After living here for 6 months, finishing the basement quickly moved to the top of the list. It solved an issue with our laundry room, created a great space for our teenage kids to hang out and have friends over AND as owners of a basement finishing company, we thought it would be a great opportunity to live the Basements Plus how to finish a basement remodeling experience, just as our customers do.
We did have an advantage in that we didn’t have to hunt and research a contractor to hire, we already knew who we wanted to finish our basement and hubby (Basement Guy) drew the plan. We did have our design team give us some feedback and finalize a detailed plan for production, so we did skip the estimate process. Once the project was “sold” it went right to our Production Team. This is where my finishing a basement journey begins with Basements Plus.
After you sign the proposal, the next step is meeting with your Project Developer. Pam and Chelsea were our Project Developers and were great in helping us with plan details and color selections. During this meeting you have the opportunity to work with designers from Basements Plus to dive into the fine details of the project. For us, this meant looking at cabinet layouts, ceiling details, and then going into paint colors and hardware selections.
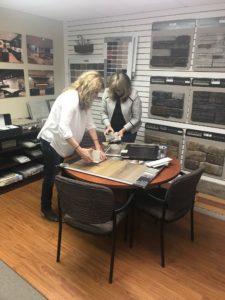
I had two selection meetings with Pam. The first one was spent on the plan details and the second on the color selection. The goal is to make this one meeting, but we ran out of time. We spent an hour and a half on the ceiling and electrical layout in the first meeting, then Pam and I scheduled to meet again to make color selections.
In this meeting we need to pick out:
I was told that I would need to have my plumbing and lighting fixtures on order before we start construction. That way when they do the rough mechanicals the plumber knows what valves to use and the electrician knows where to put the openings for the lights I bought. This was super helpful when it came time for the electrical walk through with Lee.
Bring your inspiration: I would also recommend coming to the meeting with pictures from Pinterest or Houzz of colors and styles you like and/or knowing if you are using an existing piece of furniture or a picture. This is helpful when choosing colors and the girls can help you select the right fixtures and materials to make everything flow.
For example, I knew I wanted to use a black and white cowboy picture I have in the basement bathroom, so I selected my cabinet, countertops, lights, faucet and mirror all around the idea of having a cowboy inspired theme.
| While looking for a cool light for the bar I stumbled upon this sparkly beauty on Houzz. I loved it! Now this inspired a little glam in the basement which I loved to offset the rustic floor, wood fireplace wall and barn door. I call it “rustic glam.” This light selection will definitely set the tone for furnishings and wall decor. |  |
| In the laundry room I wanted a whimsical garden feel. I had originally seen a photo of outdoor lights strung up in a painted ceiling and was inspired. I wasn’t loving the string lights or Edison light options then I found this awesome light on Houzz. It was perfect for the feel I was going for and would look great with the red countertops I wanted. |  |
The cabinet plan was easy, it was a simple layout, so we spent most of our time on our ceiling detail and layout. This was very important to us, we know that a great ceiling plan will help define spaces within a wide open floor plan. We were able to create a ceiling plan that hides the structural beams, while making the ceiling plan look purposeful. Once the ceiling plan was done we completed the electrical layout. They made the selection process fun and stress free as we worked through all the details.
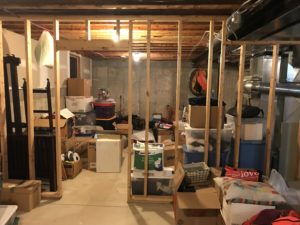
Construction is going to start soon and I need to get the construction site cleaned up and ready for the crew. I have a few options to explore when deciding what to do with my “stuff” while they’re working in the basement for a couple months.
A couple of options people have are; renting a POD and getting their stuff out of the basement, leaving some stuff in the unfinished area and covering it up, or you can do a combo of both. We don’t really have a lot of big furniture and stuff, it’s mainly boxes, so we’re choosing to build some storage shelves in our unfinished storage room and leave our stuff down here during construction.
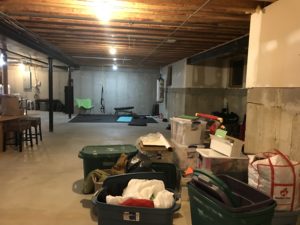
Now that we have the plan layout solidified we know what areas are designated for storage. We’re using that as our guide as to where we’re going to build the shelves. And then from there, we’ll be wrapping everything up and taping it off to keep it as clean as possible. Dust will find its way in, so if you have anything that you do not want drywall dust in, you should get it out of the basement.
TIP: If you have any concern that your items could get damaged or dusty, it’s best to get it out of the basement. The crew takes precaution to be kind and clean, but can’t guarantee that nothing will happen.
My storage shelves are built and I spent a few hours putting my boxes on the shelves and covering with painters plastic to keep the dust off of them. I have everything out of the work area and we are good to go with construction. (Man my back hurt for weeks after this chore.)
TIP: When uncovering everything you have to take the plastic off slow and roll into it-self, as the dust that did settle will fluff into the air.
Now that we have made our color and material selections, our project is almost ready for production.
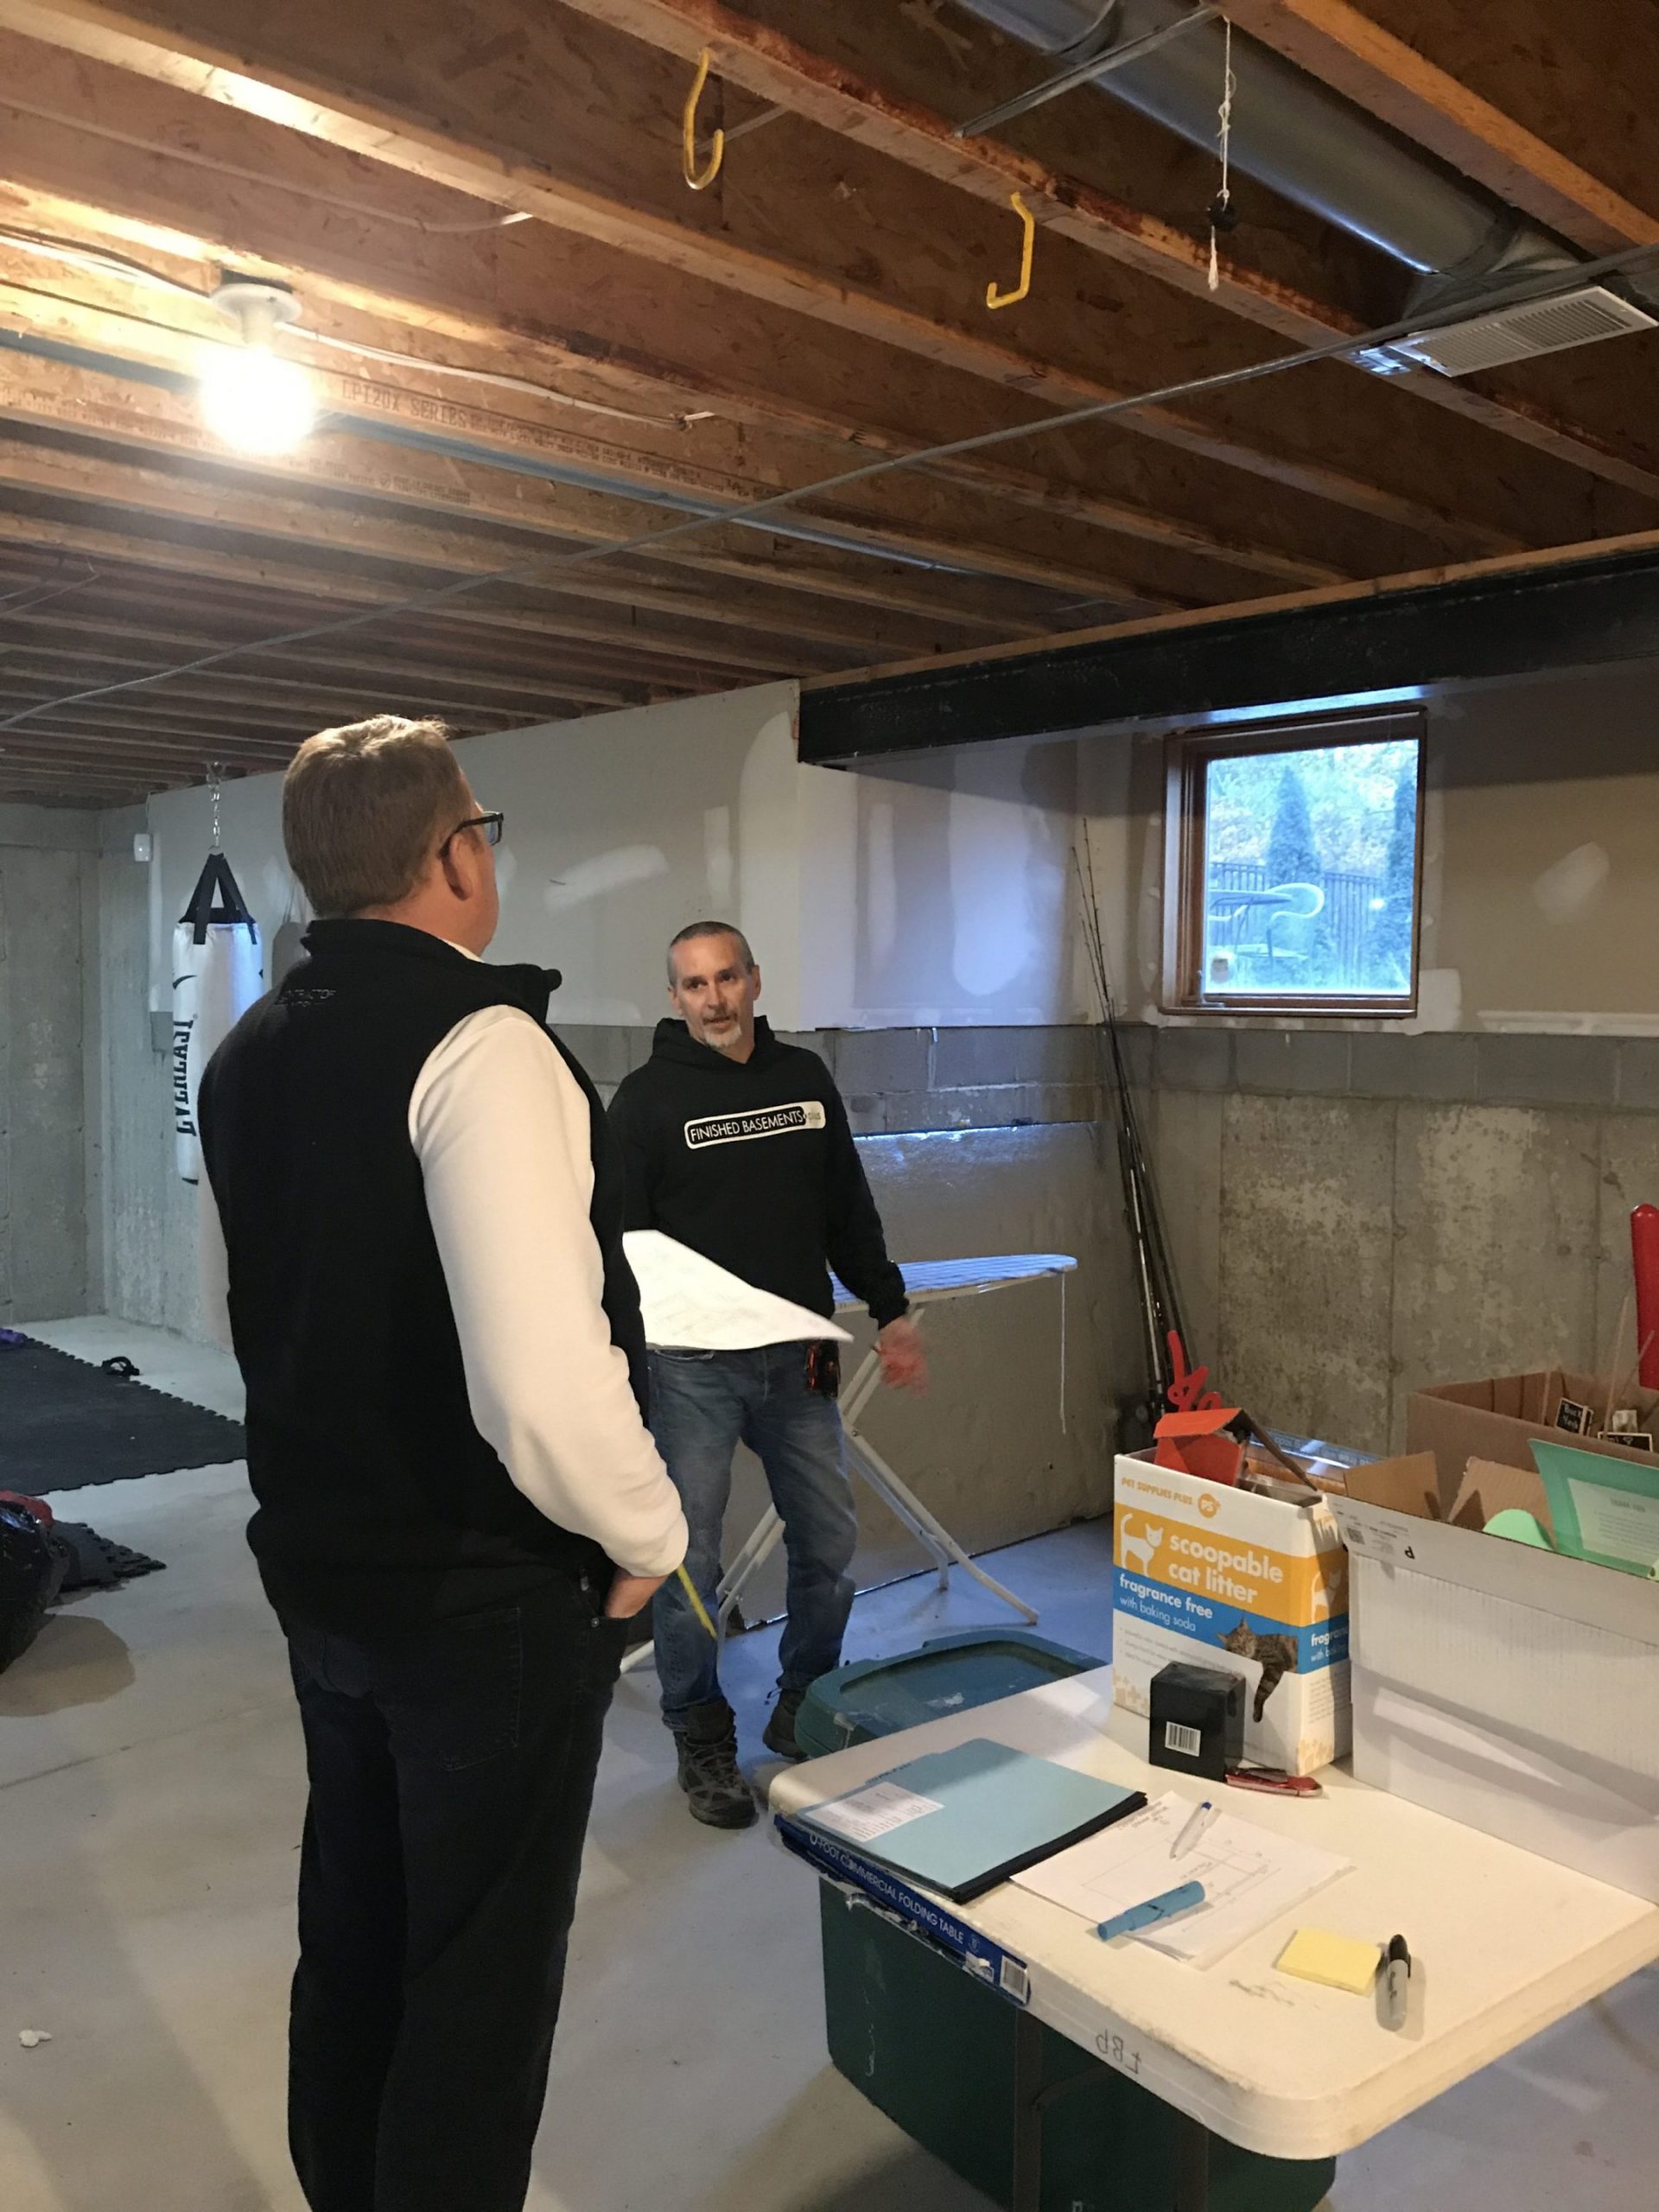
Next we will be meeting with our Project Manager, Steve Marco. At this meeting the plan dimensions will be verified, ceiling details will be discussed, and he will look for cracks that could cause issues.
We will also confirm how the crew will be entering the home, how the online calendar works, and other “house keeping” items.
All this information is reported back to the project developers to finalize the plans for production. We will then be asked to sign off/approve the plan before construction begins.
 | Measure Meeting
The measure meeting was a great experience. We had a chance to meet our Project Manager who would be our direct contact throughout the project. We also went over the more day to day details of what to expect. |
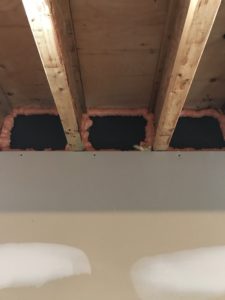 | Bond InsulationWe choose to get rid of the existing fiberglass insulation and install bond insulation. The polystyrene bond insulation is a way better insulator than fiberglass and keeps the air cleaner. |
 | Prepare Job for ConstructionThe logistics team was here to deliver materials for the rough carpentry. They laid runners from the front door to the basement door, so the crew knew right where to walk when they came in. This also helps keep the job site cleaner. I did vacuum every night to keep the dust and construction footprints from getting into other rooms. I love to vacuum and I expected to see some dust, so vacuuming the runner wasn’t a big deal for me.
|
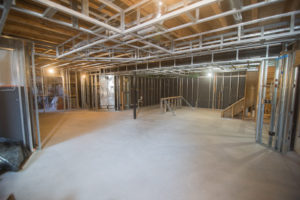
We have finished rough carpentry. The rough mechanicals have been installed and the rough inspections were completed this week. So far it has been a pretty painless process. Not a lot of dirt and dust which I was concerned about. I ran the vacuum on the runners every night from the foot traffic. Other than that, you don’t know the guys are in your house.
They are noisy when they’re working obviously. The kids weren’t too happy when they had school off all week due to the Polar Vortex and they were trying to be couch potatoes and the jack hammer is going.
This is an inevitable part of construction. Steve and I thought we had perfected the plan and we still made a few tweaks, such as adding a door after the rough frame was done. Almost every job will have electrical change orders, some big, some small. We met with the electrician, Lee, to go through the electrical layout; we talked about where we wanted lights installed and what switches would turn them on. Lee had some great ideas on cleaning some electrical wires that were going through the painted ceiling in the laundry room, adding a subpanel in the 2nd storage room, installing under cabinet lights…all this adds up quick 🙂
Lee then sent our changes to Pam and she gave us pricing on the changes. From there we had to decide if we wanted to spend the money on these changes. In the end we approved them and are very happy we spent the money on the front end to have a great finished product on the back end.
All-In-All, I’m really loving our layout and think the team did a great job with the plan.
I was very concerned about the mess at the drywall phase, but it wasn’t as messy as I thought it would be. The dustiest day was when the drywall was hung, not the sanding like I thought it would be.
We did have one unusually dusty day. The Stack Effect caused the upstairs to get super dusty when the guys were cleaning after the drywall was hung. How? You ask. The front door was open to remove garbage, a basement window was open to load material and the logistics crew was sweeping drywall dust in the basement. This wind tunnel created the perfect storm for a cloud of dust upstairs. I spent a couple hours cleaning upstairs, but after that it was lighter dust that I expected throughout the remainder of the project.
TIP: To help keep the dust down; we put cheese cloth in the registers upstairs. And it worked great. When I removed the cheese cloth after construction I was shocked at how much dust had collected on them. I had to remove it carefully because the dust was fluffing into the air.

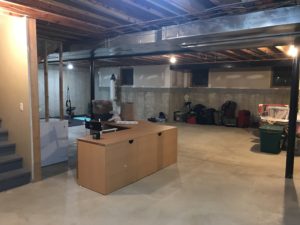
Looking Like a Finished Basement! A lot has happened since the last video. The drywall is up, cabinets are installed, the trim & doors are installed, the barn wood and barn door are hung and the floor is laid. It is looking great! I love seeing all the selections come together and I’m so happy that the colors and textures work together.
It’s fun every night to come down and see what happened that day; the bar being created, the hand-rail, the wood shiplap wall, and the barn door installed. I love being able to see everything come together. Next week the final mechanicals are going in. My lights are here! I ordered them weeks ago and they are sitting in my dining room ready to be installed.
I do need to go out and get my cabinet door hardware this week, so that is one of my to-do items. When the guys are here they can install all that or I get a trip charge if I’m not prepared. Basically, I feel like we’re in the homestretch here. All the painting is getting wrapped up, the lights will be going in, carpeting the stairs and completing punch out, smooth sailing now. It’s exciting to see it wrapping up.
Final mechanicals are being installed next week, so I need to have my owner supplied lights onsite for the electrician to install. (Note: If the electrician or plumber needs to come back because the fixtures you are supplying are not onsite, you will be invoiced for a trip charge.)
Items you need to have onsite in the final installation phase:
As I mentioned before, I found two lights on Houzz and was super excited about them. I couldn’t wait to come home and see them installed. While I was at work the electrician called and informed us that the laundry room lights were European and the wiring wasn’t going to work. He suggested that I return them or get them rewired. Ugghh! So they did not get installed and I needed to figure out what I was going to do about the lights.
After all the discussions with the design team and the electrician, I was under the impression that I needed 2 light fixtures in the stairway. I bought a set of lights and it was too big for the top of the stairs. Returned and bought another set, again too big and needed to be returned. In the meantime, hubby clarified that I only need one light – at the top of the stairs. Great, that makes it easier for me to find a light, but I could see on Builder Trend that the electrician was coming the next day to install lights, so I need to buy a light tonight. I ran up to Home Depot and found the perfect light; small, cute and cheap!
Then I walked around the corner to check out my bathroom lights and BOO the wrong lights were installed. So I told you about my two stairway lights that needed to be returned. Well, when I put the lights in the bathroom for the electrician to install, I grabbed the wrong ones. I put the ones to return in the bathroom; and my bathroom lights in the return pile. Luckily I didn’t return them yet and the correct lights did eventually get installed in the bathroom.
Reminder: When buying your light fixture, make sure to buy the bulbs too!
We are in the “Punch Out” phase of our project. This is where it all comes together.
Our project manager told us he had it all under control and it turns out he did. Seems like a slow couple of weeks as details are being tended too and making sure all contract items are installed. But this time period is important, as these are the nitty-gritty items you will be looking at all the time and you (and FBP) want your basement to look perfect.
Steve Marco (Project Manager) had a list of items that he planned to get done when the time was right. Items like, drywall spotting, paint touch ups, door hardware installation, adjusting cabinet doors/drawers, etc. These “little” loose ends really put the finishing touches on a great basement finish. Also, while the punch out is being done final inspections are taking place, all approved, green tags!
We’re in the homestretch. The painters were in today and gave the basement its final coat. The carpet is going in on Monday! So next week it’s going to be carpet and cleanup and it will look like a finished basement.
The end of the project is when a lot of the little details are tended too in order to perfect the finished basement. Basements Plus has a four page punch list to review throughout the job. That way when we get to the end of the project there shouldn’t be any surprises. Our goal is to have zero items on the punch list when we meet for our final orientation. To reach this goal the project manager is always looking over the job and creating the punch list throughout the project.
As mentioned before most of the punch out happens at the end of the job. At Basements Plus, we have a four page checklist to inspect for quality and completeness before we meet for our final orientation with the owner.
Punch out list examples include:
At the end of the project the Project Manager will walk through the basement with the homeowner to explain how mechanical items work, what to do if there is ever a water event, and any special care instructions.
At this time if a punch out item is pointed out, it will be added to the punch out list. The job is considered complete when the homeowner and contractor agree that all items in the contract are complete and all punch out items are complete.
Having a blank slate to design and decorate can be a daunting task for most homeowners, I being one of them.
Seeing hundreds of awesome lower levels over the years plants all kinds of ideas in my head of what I would do when I finished my basement. It starts with the design, you have to work with your unique basement constraints and wants, making each basement unique. Our basement design was pretty easy, as each area had a perfect space for the rooms we wanted and everything flows really well. The color scheme came from starting with the cabinet color and working through the counter-top, to the flooring.
Once these main decisions were made the accent walls (tile and wood) and paint colors would set the mood of the room.
I didn’t have a color scheme going into this project, I just was making decisions along the way. As I mentioned before, when I was looking for lights at the start of the project, I found a sparkly light for the bar area and thought it would be fun and different. This led me to choosing my first piece of furniture, a glass table. The table was shown with green chairs in the store and I loved it, so there was my accent color.
Decorating did stall for months while I was looking for a couch. Days of shopping and looking at fabric swatches. Wondering if the couch would fit down the switch-back stairs. We needed to get the sectional couch in smaller pieces which adds to the cost of the furniture. I needed to consider the kids would be hanging out down here the most and would be sleeping on it a lot. I didn’t want to spend a lot of money on this item considering this. Eventually I did find what I wanted.
Once the couch was picked out I then could move onto the area rug. This again wasn’t an easy task. I could go to Home Goods and find one cheap, but it wasn’t the right size or texture or color. After looking for weeks, we finally decided to have a custom area rug made. We went to the carpet store, picked a carpet and got to tell them what size I needed and could even add an angle on one corner to mimic the angle on the ceiling. Considering the size and customization the cost was very reasonable.
There are a ton of beautiful TV consoles out there, but I just wasn’t falling in love with any of them. Then I remembered a custom TV console that FBP built for a customer that was awesome and knew that it would be a great idea for my living room, so happy with how this came out.
Oh and I couldn’t figure out what I wanted to do with the wall along the ping pong table. I didn’t want sports stuff up and was leaning towards something outdoors, but didn’t have an idea. I kept seeing this huge metal fish in a couple stores when I was shopping and finally figured out where I was going to hang it. We still needed to figure out how I was going to tie this huge fish into the basement decor and make it feel like “he” has a purpose. Then I remember all four of us have photos from fishing trips and I could use these on the walls. I printed the photos black and white on metal and worked out awesome. Even the kids loved them on the wall.
And I am done!
BEFORE | AFTER | ||
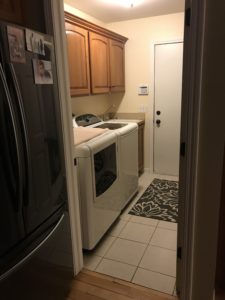 | In the original laundry room, you entered from the garage making the room tight and not very useful. |  | New laundry room is huge, making lots of room to sort and fold clothes. |
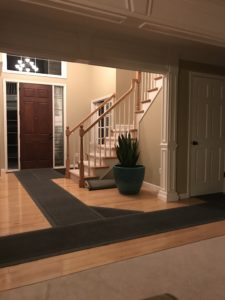
 | I don’t want to feel like I am in a basement. | 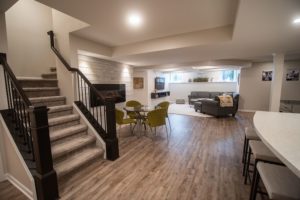 | Open stair rail makes it feel like the lower level. |
 | When your basement is unfinished, you tend to put boxes and stuff anywhere. | 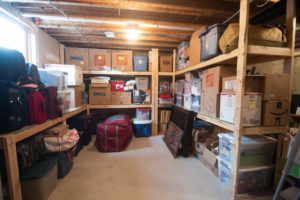 | Dedicated storage rooms and shelves make an untidy scene, tidy. |
 | We tried to create a work out area we would use…. | 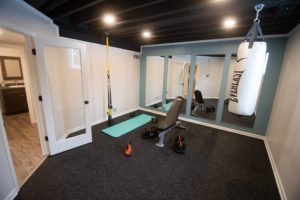 | Now we did! |
 | When you have blank walls you can do whatever you want. | 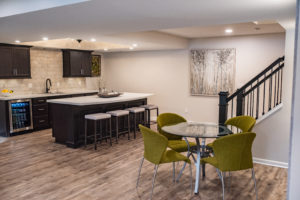 | New bar |
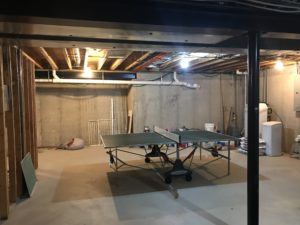 | Old ping-pong area… | 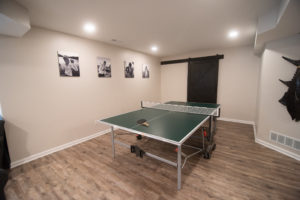 | New ping-pong area 🙂 |
 | This was the perfect spot to make the TV area, right near the windows. |  | Custom details make this space feel special. |
Check out our basement finishing service areas in Genesee, Livingston, Macomb, Oakland, Washtenaw, and Wayne Counties throughout Michigan.

Finish Now & Pay Later! (cannot be combined with any other offers)
Limited time offer – Enjoy your lower level without the stress of paying right away.